
The Secrets to Perfect Bokeh and Beautiful Backgrounds in Your Photos
In the world of photography, the allure of a velvety bokeh effect, where the background melts away in a dreamy haze, allowing the subject to stand out sharply, cannot be overstated. This captivating technique is not just about creating a beautiful blur; it’s about directing the viewer’s attention with precision and artistry. Bokeh not only enhances the aesthetic appeal of an image but also draws the viewer’s eye to the subject with a sense of focus and intent. It allows the main subject to speak clearly while everything else whispers in soft, elegant tones.


Understanding and mastering this skill will elevate your photography, transforming simple shots into mesmerising works of art.
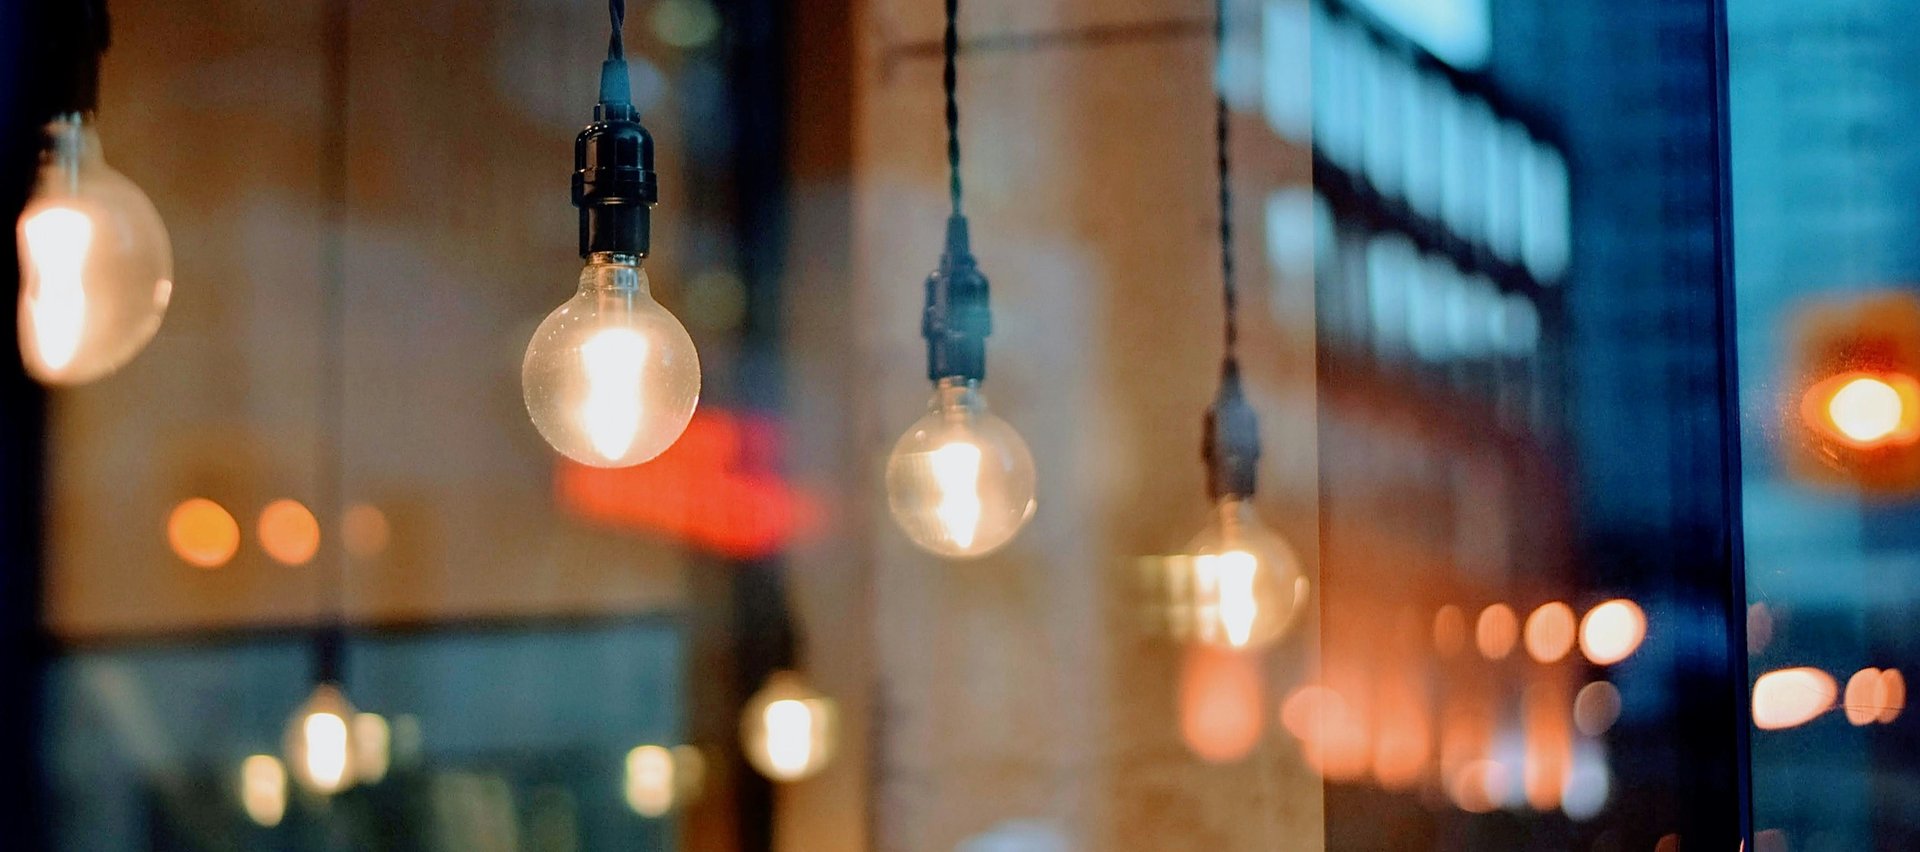
The beauty of bokeh lies in its ability to create a sense of depth and emotion in a photograph. It’s not merely about blurring the background but doing so in a way that adds dimension, softness, and atmosphere to the image. By learning to control bokeh, you can create images that seem to breathe with life, leading the viewer’s eye exactly where you want it to go, creating a visual experience that feels almost three-dimensional. The circles of confusion, which are essentially the blurred points of light in the background, play a key role in defining the quality of the bokeh. When crafted with care, these light circles transform into captivating orbs that add a magical touch to the overall composition.
Let’s explore how you can master the art of bokeh and create stunning backgrounds that will take your photography to the next level.
Lens Choice Matters
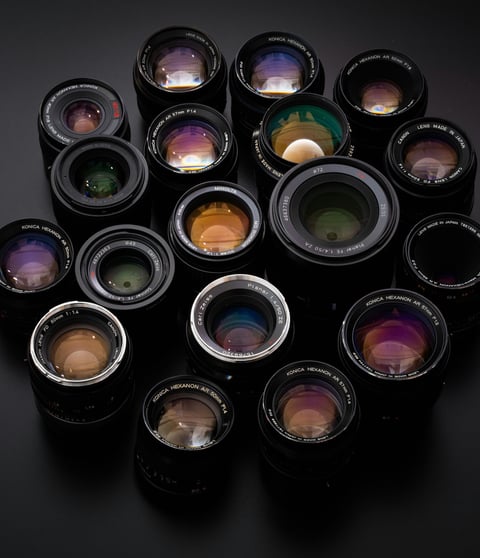
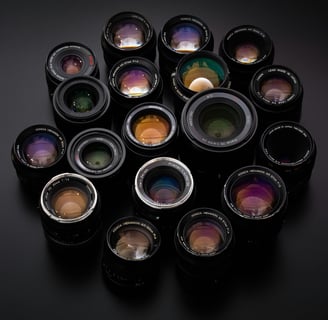
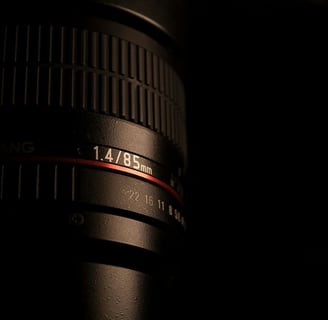
Your choice of lens is paramount in achieving high-quality bokeh. Lenses with larger maximum apertures (lower f-numbers) are ideal for producing that creamy, out-of-focus background effect. Prime lenses, which have fixed focal lengths, are generally preferred over zoom lenses for bokeh photography because they tend to have wider apertures and superior optical quality. For example, lenses such as f/1.4, f/1.8, or f/2.8 allow more light to enter the lens, enabling you to achieve a shallow depth of field, which is crucial for strong bokeh effects.
When choosing a lens, it’s important to remember that not all lenses are created equal when it comes to bokeh quality. Some lenses, even those with wide apertures, may produce harsher or less aesthetically pleasing bokeh. This can be due to the lens construction, specifically the shape and number of aperture blades. A lens with more aperture blades or more rounded blades tends to create smoother, rounder bokeh, whereas lenses with fewer blades or angular blades can produce bokeh that looks more polygonal or distracting. High-quality prime lenses, such as an 85mm f/1.4 or a 50mm f/1.8, are excellent choices for portraits where bokeh plays a major role.
In addition, different lenses produce different styles of bokeh. Some may create a soft, buttery blur that blends seamlessly with the subject, while others may result in a harsher separation. Experimenting with different lenses will help you discover the bokeh style that best complements your artistic vision.
Aperture Settings
Aperture settings are fundamental to creating a strong bokeh effect. The wider your aperture (the smaller the f-number), the shallower your depth of field becomes, which results in more pronounced background blur. For example, using an aperture of f/1.4 or f/2 will create a very shallow depth of field, where only a small portion of the image is in focus, allowing the background to melt away into a dreamy haze. This is where those beautiful circles of confusion come into play, especially when there are points of light in the background, like street lamps or fairy lights.
However, controlling aperture requires more than simply setting it to the widest possible opening. The size of the aperture not only affects the amount of background blur but also the intensity of the bokeh’s aesthetic qualities. A very wide aperture can produce dramatic bokeh, but it can also make it challenging to keep enough of your subject in focus, particularly in close-up portraits. Experiment with different aperture settings to find the right balance between subject focus and background blur. For some images, a slightly narrower aperture, like f/2.8 or f/4, might provide the perfect blend of sharpness and soft background separation.
Additionally, the distance between your subject and the background also influences how wide your aperture needs to be. If the background is very far away, you might achieve a beautiful bokeh even at f/4. Understanding the relationship between aperture, distance, and depth of field will help you consistently produce the right level of blur for your shots.
Distance Dynamics
The distance between your camera, your subject, and the background plays a critical role in achieving bokeh. To create that velvety, out-of-focus background, you need to position your subject far enough away from the background. The greater the distance between the subject and the background, the more pronounced the blur will be. This separation allows the background to fall further out of focus, creating a sense of depth in your image.
Another factor to consider is the distance between your camera and your subject. Getting closer to your subject will narrow the depth of field even more, enhancing the bokeh effect. This is particularly useful in portrait photography, where you want the viewer’s attention to be solely on the subject’s face, with the background softly blurred into a beautiful haze. By carefully adjusting these distances, you can create an image where the subject seems to pop out of the frame, almost as if they’re being lifted out from the background.
In addition, consider how the elements in the background interact with the bokeh. For instance, a background filled with points of light, such as a cityscape at night or sunlight filtering through leaves, can result in enchanting circles of confusion. These light points create visual interest and add an extra layer of atmosphere to your image. Playing with these distances and background elements will allow you to craft the perfect bokeh effect.


Focal Length and Bokeh
Focal length has a profound impact on the appearance of bokeh. Longer focal lengths, like those found in telephoto lenses, are known for creating more intense background blur, especially when used at wide apertures. Lenses such as 85mm, 135mm, or even 200mm compress the background, making the out-of-focus areas appear smoother and more diffused. These longer focal lengths are often favoured in portrait photography because they allow the photographer to isolate the subject from the background in a visually striking way.
Telephoto lenses have a narrower field of view, which means they capture a smaller portion of the background, making it easier to create a soft, out-of-focus look. When used correctly, these lenses can transform a busy or distracting background into a dreamy wash of colour and light, ensuring that the subject remains the focal point of the image. In contrast, wide-angle lenses tend to have a deeper depth of field, making it harder to achieve strong bokeh unless you get very close to your subject and use a wide aperture.
Experimenting with different focal lengths can dramatically change the way bokeh appears in your images. While longer focal lengths generally produce smoother bokeh, it’s important to choose the right lens for the shot you want to create. A 50mm or 85mm prime lens, for example, is perfect for portraits, while a 135mm telephoto lens can create stunningly soft backgrounds for more distant subjects.
Light and Bokeh
Light is a key ingredient in creating bokeh, and the type of light in your background can dramatically affect the quality of the bokeh you achieve. Points of light, such as fairy lights, reflections on water, or even dappled sunlight through trees, can create stunning circles of confusion when out of focus. These points of light become soft, glowing orbs in the background, adding a magical touch to your image. Shooting at times when there are distinct points of light, such as during golden hour or at night, can enhance the bokeh effect.
Consider how different light sources impact your bokeh. Soft, diffused light will create a gentler, more subtle background blur, while harsher, direct light may produce sharper, more defined circles of confusion. By playing with light, you can control the mood and atmosphere of your image, adding depth and character to your photos.
Also, think about how your subject is lit in relation to the background light. Backlighting, where the light source is behind your subject, can create beautiful rim lighting around the subject while leaving the background in a soft, glowing blur. Understanding how to manipulate light in your scene will help you achieve more dynamic and visually striking bokeh.
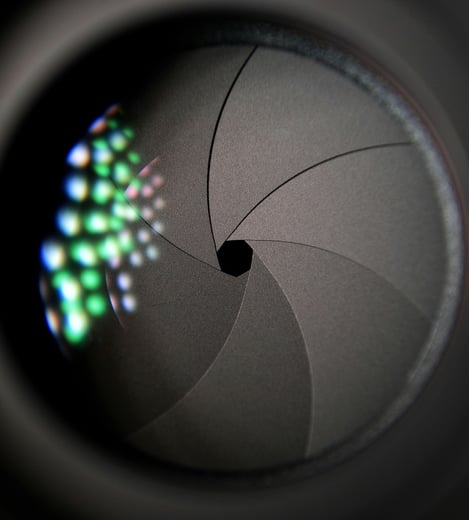
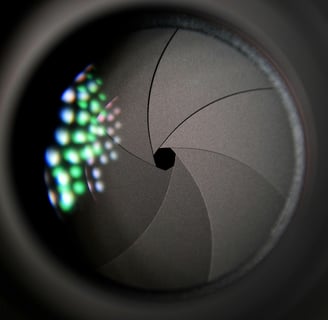
Lens Quality and Blade Count
The construction of your lens plays a critical role in the quality of bokeh you can achieve. The number and shape of the aperture blades inside the lens are key factors. Lenses with more blades, especially if those blades are rounded, will produce softer, rounder circles of confusion. This creates the smooth, creamy bokeh that many photographers strive for. On the other hand, lenses with fewer blades or more angular aperture blades may result in polygonal bokeh, which can appear harsher and less visually appealing.
Higher-end lenses, particularly those designed for portrait photography, often have more rounded aperture blades specifically for producing smoother bokeh. While these lenses can be more expensive, they are well worth the investment if bokeh is a key element in your photography. The subtle differences in lens quality can make a huge impact on the overall look and feel of your images.
When choosing a lens, it’s important to consider how the design of the lens affects both the sharpness of your subject and the quality of the out-of-focus areas. Lenses with excellent optical quality not only render sharp subjects but also produce a more pleasing transition between in-focus and out-of-focus areas. This smooth transition is what creates the desirable “creamy” bokeh effect.
Post-Processing Tips
While most of the bokeh effect is achieved in-camera, post-processing can help refine and enhance the background blur. Tools like Gaussian blur or lens blur in software such as Photoshop can be used to enhance the blur in areas where it may not be as strong as desired. However, it’s important to be subtle in your post-processing to avoid making the blur look artificial or overdone.
In some cases, you may find that the background needs slight adjustments to maintain a consistent bokeh effect. For example, if part of the background is distracting or not as smoothly blurred, selective blurring can help to maintain focus on the subject. Additionally, post-processing can be used to enhance the brightness or contrast of the bokeh or even to add warmth or coolness to the tones, depending on the mood you want to create.
However, the goal should always be to capture as much of the desired bokeh in-camera as possible. This ensures a more natural and authentic look that doesn’t rely on heavy editing. Mastering the art of bokeh during the shooting process will save you time in post-production and yield more professional results.

Conclusion
Mastering bokeh requires a combination of technical knowledge, the right equipment, and a creative eye. By understanding how to manipulate aperture, distance, focal length, and light, you can create images that draw viewers in with soft, enchanting backgrounds and sharp, captivating subjects. Whether you’re shooting street portraits or still life, bokeh adds an element of beauty and artistry that elevates your photography to the next level.
The tips outlined here provide a strong foundation for capturing stunning bokeh in your images, but don’t be afraid to experiment. Each scene is unique, and with practice, you’ll develop your own style and approach to bokeh that reflects your artistic vision. So, grab your camera, explore the possibilities, and let the world of creamy backgrounds and circles of confusion inspire your next masterpiece.
If you're ready to take your street photography to the next level, why not invest in one of my personalised mentoring packages? With decades of experience, I offer tailored guidance to help you refine your skills, develop your creative vision, and master the art of capturing compelling street scenes. Whether you're a beginner looking to build a strong foundation or an advanced photographer aiming to hone your craft, my mentoring services are designed to meet your needs. Explore the options today and start transforming your photography.
© 2025 Peter Pickering. All Rights Reserved, All Wrongs Reversed.